A dead battery always seems to strike at the worst possible time—right before work, in a parking lot, or when you're far from home. While jump-starting is a useful skill every driver should know, it's also one of the most misunderstood car maintenance tasks. Done incorrectly, it can fry electronics, damage batteries, or even create a dangerous spark hazard.
If you’ve ever found yourself second-guessing where to connect the cables or wondering if your car could get damaged in the process, you’re not alone. Let’s walk through the most common mistakes drivers make when jump-starting a car—and how to do it safely.
Mistake #1: Hooking Up the Cables in the Wrong Order
When you’re in a rush, it’s easy to connect jumper cables without thinking twice. But mixing up the order or attaching them to the wrong points is a recipe for electrical damage—or worse.
Here’s the correct sequence:
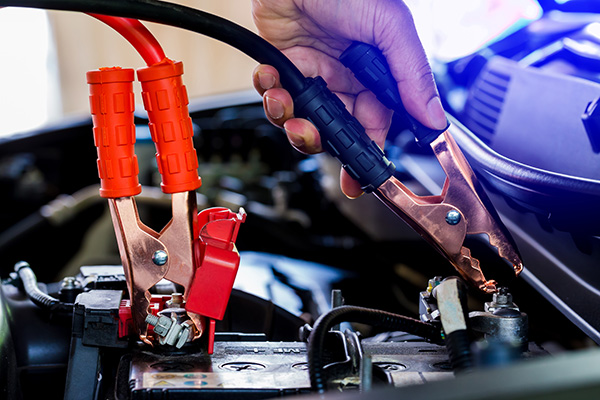
- Connect the red (positive) cable to the positive terminal of the dead battery.
- Connect the other end of the red cable to the positive terminal of the working battery.
- Attach the black (negative) cable to the negative terminal of the working battery.
- Lastly, connect the black cable to an unpainted metal surface on the engine block or frame of the dead vehicle—not to the negative battery terminal.
Why? Attaching the black cable directly to the dead battery’s negative post could cause a spark that ignites battery gasses—especially if the battery is leaking or damaged. Always use a clean ground point on the engine or chassis instead.
Mistake #2: Using Damaged or Inadequate Jumper Cables
Not all jumper cables are created equal. If your set is worn, frayed, or too thin (low gauge), it might not deliver enough current to start your car—and it can overheat in the process.
Look for heavy-duty jumper cables that are at least 10-gauge or thicker, with solid clamps that grip securely to battery terminals. Cheap cables often struggle to maintain contact, and poor conductivity can leave you with a weak or failed jump-start attempt.
It’s also important to inspect your cables periodically, especially if they’ve been sitting in the trunk for years. Cracked insulation or corrosion on the clamps is a sign it’s time for a new set.
Mistake #3: Trying to Jump a Damaged or Frozen Battery
A battery that’s visibly cracked, bulging, leaking, or giving off a strong sulfur smell isn’t safe to jump—it’s dangerous. Jump-starting a physically compromised battery can cause it to explode or leak acid, which can harm you or your vehicle.
In cold climates, a frozen battery is another major risk. When the electrolyte inside the battery freezes, trying to charge it can lead to permanent damage or worse. If your battery looks damaged or shows no signs of life after a jump, it’s safer to tow the vehicle and have the battery tested or replaced by a professional.
Mistake #4: Not Letting the Battery to Charge Before Trying to Start
Many drivers make the mistake of trying to crank the engine immediately after connecting the jumper cables. But giving the dead battery a few minutes to charge before turning the key increases your odds of a successful start.
Let the donor vehicle run for at least 2 to 5 minutes with the cables connected. This allows the dead battery to absorb some charge and helps stabilize voltage across both systems. Once enough power has built up, try starting the engine. If it doesn’t crank after a couple of tries, wait another few minutes—or consider that the battery might be beyond saving.
Mistake #5: Not Removing the Cables in the Right Order
Disconnecting jumper cables may seem simple, but pulling them off in the wrong sequence can still cause dangerous sparks or voltage surges.
Here’s the safe disconnection order:
- Remove the black (negative) cable from the grounded metal surface on the previously dead car.
- Remove the black cable from the negative terminal of the donor vehicle.
- Remove the red (positive) cable from the donor battery.
- Finally, remove the red cable from the jump-started vehicle.
Make sure none of the clamps touch each other or any metal surface while they’re still connected, as this could create a short circuit. After the jump, let your car run for at least 15 to 30 minutes to allow the alternator to recharge the battery.
How to Tell If Your Battery Needs More Than a Jump
If your battery keeps dying, it might not be a one-time issue. Frequent jump starts could point to a deeper electrical problem, such as:
- A battery that’s past its lifespan (most last 3–5 years)
- A weak alternator that isn’t charging properly
- Corroded or loose battery terminals
- A parasitic draw draining power while the car is off
It’s a good idea to have your battery and charging system tested to see if your car needs multiple jump starts. A simple battery test can reveal whether it just needs a charge or if it’s time for a replacement.
If you’ve had to jump your car more than once recently, it’s time to get it checked out. At Kwik Kar Auto Repair in Richardson, TX, we’ll inspect your battery, charging system, and cables to make sure everything is working like it should—and we’ll help you avoid future no-start situations.